
Short answer
Your print design is a different size from the paper your printer is actually loaded with. Match the design to a size the printer reports, and the border disappears. This is almost never a problem with the design itself.
A dye-sub printer will happily accept a design that does not match its paper. Rather than refuse the job, it shrinks your artwork to fit and leaves the difference as white space. That white space is the border you are looking at.
1. Find out what your printer is holding
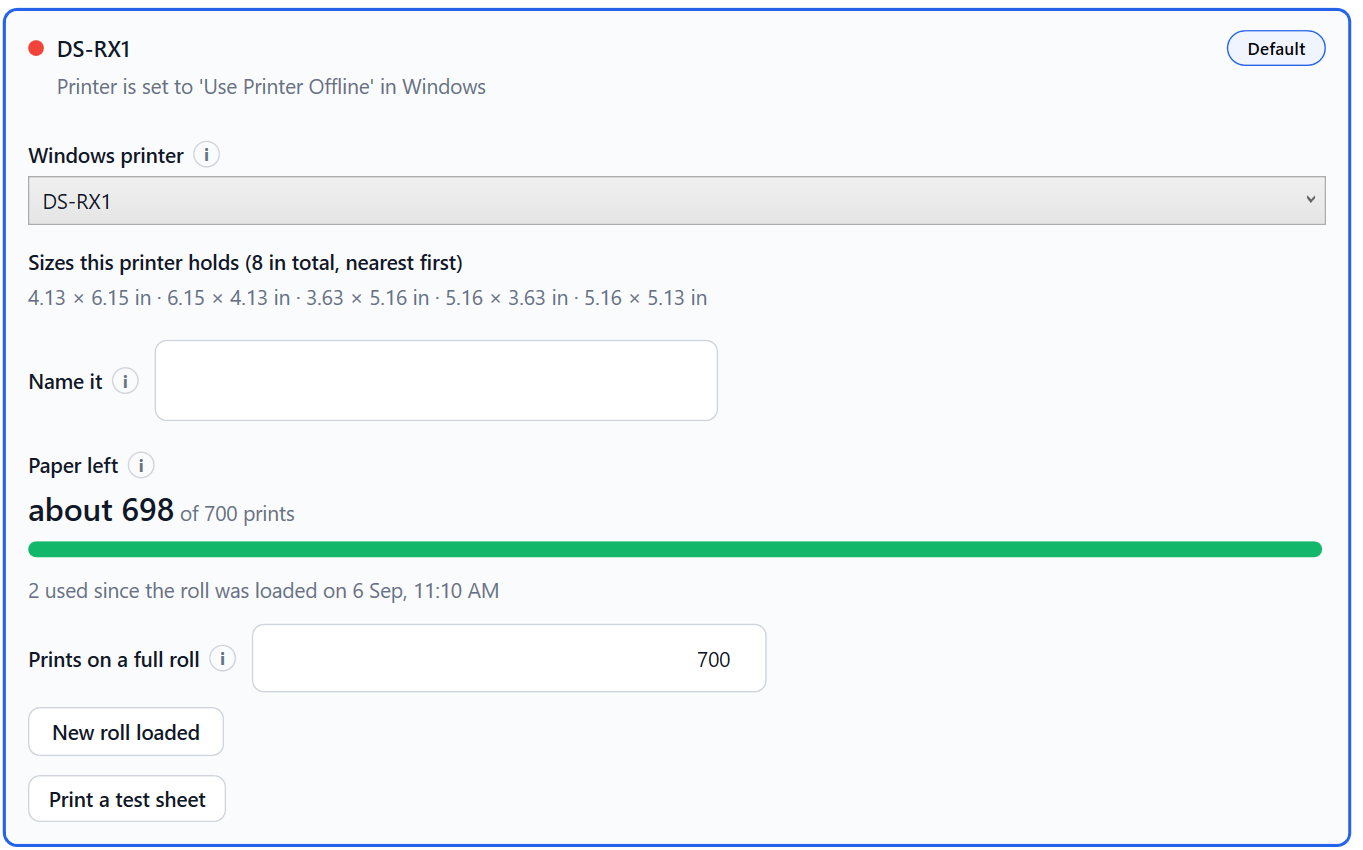
Open Studio, then under Hardware choose Print. Under your printer you will see a line reading Sizes this printer holds, with the nearest match first.
Write down the first size on that list. On a booth loaded with 4×6 paper it usually reads something close to 4.13 by 5.85 inches, which is the real printable area rather than the number on the box.
2. Compare that to your design
Go to Design, then Photo Strip. Under each saved design is a small badge showing whether the printer can hold it. A check mark and a size mean you are fine. If that badge is missing or complaining, you have found your border.

3. Fix the mismatch
You have two ways to go, depending on which one is wrong.
- If the design is the odd one out, click Edit on it and set it to a size the printer listed.
- If the printer is the odd one out, open Windows Settings, then Printers and scanners, pick the booth printer, open Printing preferences, and choose the borderless version of your paper size. Windows often defaults to the bordered one, and the two sit next to each other with nearly identical names.
4. Print a test sheet
Back on the Print page there is a Print a test sheet button. Use it rather than running a whole guest session, so you spend one sheet instead of several.
If the border is still there
Open the design and use Preview. The preview shows where the printer will cut. If the preview looks right and the paper does not, the problem is in the Windows printer settings rather than anything inside VertexBooth.
Running more than one printer? Each print design can be pointed at a specific machine, so check the strip is going to the printer you just fixed and not the other one.